
Editing guide · Lightroom Classic, Lightroom and Photoshop
How to Fix Overexposed Photos
To fix an overexposed photo, first check how much is actually clipped: turn on the clipping warning (J in Lightroom) and see what is pure white. Then lower Exposure until skin and midtones look right, pull Highlights down and set Whites just short of clipping, put contrast back with Blacks, and use a mask for the areas the global sliders cannot reach. What is clipped in the raw file cannot be recovered, only rebuilt.
Steps are written for Lightroom Classic, with the Lightroom (cloud app) and Photoshop equivalents where they differ. The sliders are the same in all three; the panels they live in are not.
Key takeaways
- Check clipping before touching a slider: J toggles the clipping warning in Lightroom Classic’s Develop module and in Lightroom.
- Detail that is clipped to pure white in the raw file cannot be recovered by any slider; it can only be toned down or rebuilt.
- Set Exposure for the midtones and skin, then use Highlights and Whites for the bright end. Holding Alt (Option on a Mac) while dragging Whites shows exactly where clipping starts.
- Masks such as Select Sky and Linear Gradient fix the areas a global edit cannot, without darkening the whole frame.
- Fix one frame, then apply it to the rest of the sequence with Sync Settings or Match Total Exposures.
Last reviewed by the Pinnacle Edits editing team.
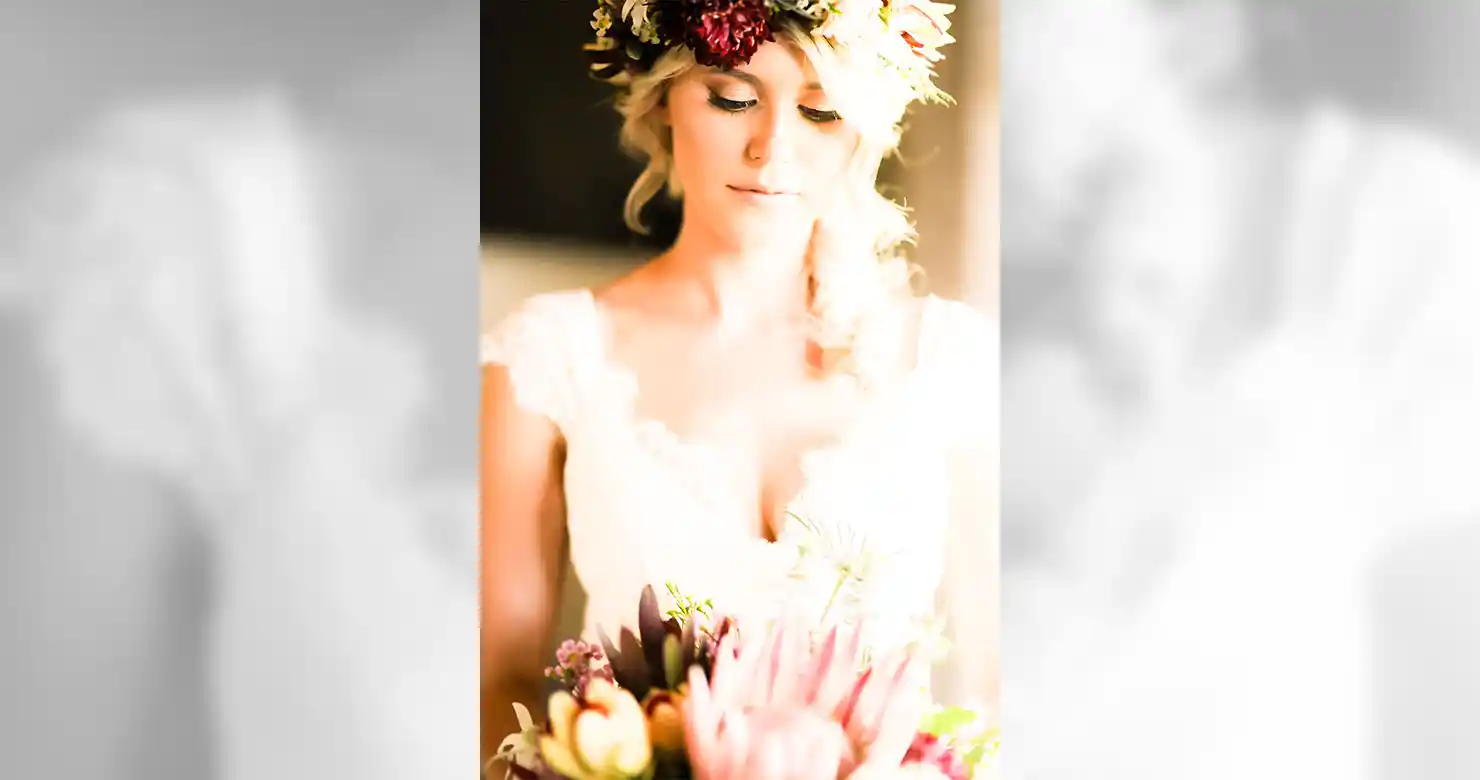
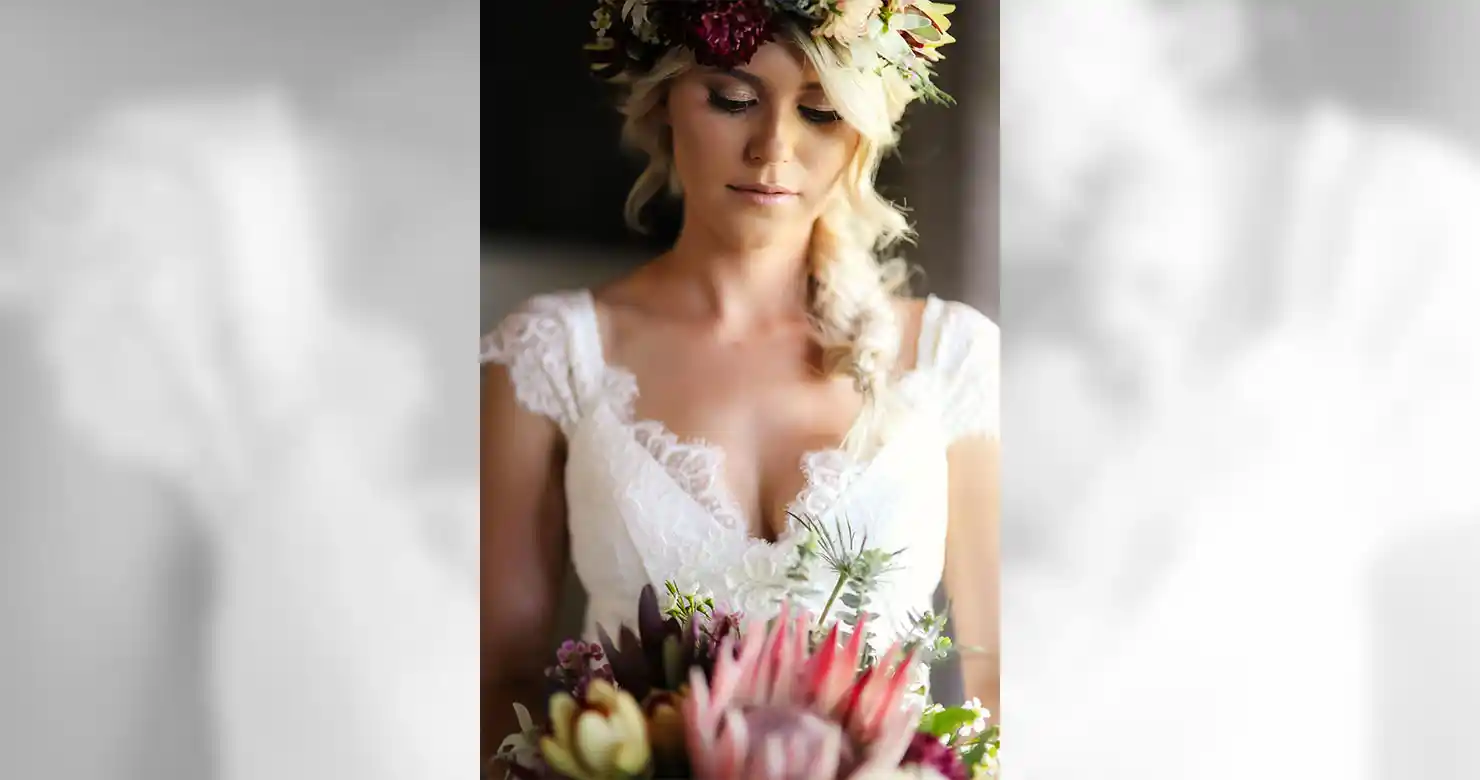
How to fix an overexposed photo, step by step
Raw files leave the most room: a raw file usually holds more highlight detail than the JPEG the camera makes from it. A JPEG can still be improved with the same steps, there is just less to pull back.
See what is clipped before you change anything
Lightroom Classic
In the Develop module, press J to show clipping, or click the white triangle at the top right of the Histogram panel. Areas that are clipped to pure white are highlighted.
Small clipped areas (a specular highlight on a ring, a light bulb) are normal and can stay. Large clipped areas in a face, a dress or a sky are the problem. If they are still clipped once the sliders below are done, the detail is not in the file.
Choose the profile first
Lightroom Classic· our practice, not a rule
The profile is applied before every slider. In the Basic panel, open the Profile menu and choose Browse to open the Profile Browser; Adobe Color is the default for raw files.
We pick the profile before any slider moves, because changing it afterwards shifts the whole tonal starting point and you end up redoing the sliders.
Set Exposure for the midtones, not the whites
Lightroom Classic· our practice, not a rule
Lower Exposure in the Basic panel until skin and midtones look right. Ignore the white dress, the sky and the window for now; the next step is for them.
The trap is pulling Exposure down until the brightest thing in the frame looks right. That turns faces grey. Exposure moves the whole image; the bright end has its own sliders.
Pull Highlights, then set Whites with the clipping view
Lightroom Classic· our practice, not a rule
Drag Highlights to the left to bring back detail in the bright areas. Then hold Alt (Option on a Mac) while dragging Whites: the image turns black, and whatever shows through is clipping. Set Whites just short of the point where important areas appear.
As a starting point, not a rule, we often begin with Highlights somewhere around −40 to −70 and decide Whites by the Alt-drag view. Every frame is different; the clipping view is what you trust, not the number.
Put the contrast back
Lightroom Classic· our practice, not a rule
Recovering highlights compresses the bright end and can leave the frame looking flat. Hold Alt / Option while dragging Blacks to set a true black, and adjust Contrast to taste. Dehaze, in the Presence section of the Basic panel, can help where overexposure has left a washed-out veil, but a little goes a long way on skin.
In Lightroom (the cloud app) the same tone sliders are in the Light section of the Edit panel, and Dehaze is in the Effects section.
Mask what the global sliders cannot reach
Lightroom Classic
Open Masking (Shift+W). For a bright sky use Select Sky; for a window or a hot side of the frame use Linear Gradient; for anything else, Brush. Then lower Exposure or Highlights inside the mask only.
This is usually the difference between a recovered photo and a muddy one: the face keeps its brightness while the blown background comes down.
Apply the fix to the rest of the sequence
Lightroom Classic
Overexposure rarely comes one frame at a time. Select the fixed photo first, then the others from the same light, and press Ctrl+Shift+S / Cmd+Shift+S (Sync Settings).
If the frames were shot at different settings in the same light, Settings > Match Total Exposures in the Develop module evens out their overall exposure to match the selected photo (Ctrl+Alt+Shift+M / Cmd+Option+Shift+M).
When this does not work
The highlight is clipped in the raw file
If the clipping warning still shows large areas after Highlights and Whites are pulled down, the detail was never captured. Pulling further only turns pure white into flat grey. The options are to accept it, to tone it down so it reads as bright rather than broken, or to rebuild it in Photoshop from another frame.
The sky goes grey and the faces go muddy
That is the global sliders being asked to do a local job. Bring Exposure back up for the faces and use a mask on the sky or window instead.
A recovered frame no longer matches its neighbours
Fixing one frame in a sequence by hand makes it the odd one out. Sync the fix across the sequence, then check the set side by side in Survey view (N).
It is a JPEG, or a phone photo
The same steps work, but there is much less headroom in a JPEG than in a raw file. Expect to recover less, and expect banding in smooth areas such as skies if you push hard.
Prefer to hand it off?
Hand us the sequence that went bright
Exposure correction and highlight and shadow recovery are part of our wedding photo editing, applied consistently across the whole gallery rather than frame by frame. For portrait, product and real estate shoots, the same work comes under outsourced photo editing.
- Wedding photo editing — exposure, contrast, shadow and highlight recovery across a gallery
- Outsourced photo editing — portrait, product, real estate and wedding work
The free trial is 5–10 of your own photos, edited and returned. No card required.
Fix Overexposed Photos
Quick Questions
Can you fix an overexposed photo?
Usually, if the detail is still in the file. Lower Exposure for the midtones, pull Highlights and Whites down, and mask the brightest areas. Anything clipped to pure white in the raw file cannot be recovered, only toned down or rebuilt.
How do I see which parts of a photo are overexposed in Lightroom?
Press J in the Develop module of Lightroom Classic, or in Lightroom, to show clipping; clipped highlights are marked on the image. In Lightroom Classic you can also hold Alt (Option on a Mac) while dragging Whites or Exposure to see a clipping view.
Why does my recovered sky look grey?
Because the sky was clipped, and pulling down a clipped area turns pure white into flat grey with no detail in it. Use a sky mask to bring it down only as far as it still looks natural, or replace the sky in Photoshop if the job calls for it.
Does the Auto button fix overexposure?
It is a reasonable starting point. In Lightroom Classic, Auto in the Basic panel sets the tone sliders for you (Ctrl+U or Cmd+U). It does not know the subject, so check skin and the brightest areas afterwards and adjust by hand.
Checked against Adobe's documentation
Menu names, panels and shortcuts were checked against these Adobe help pages on 9 October 2026. Adobe renames things between releases; if a menu has moved, the help page is the place to look.